| Building the bat-light board | |||
General information
For the materials list, part numbers/links to Radio Shack are given as they have a lot of stores. However you can find all of these things at surplus electronics places, however sometimes you have to buy things in 25 packs, etc., and if you're just making one you'll have a lot of left-overs. You could also use screw type lamps and sockets but I prefer bayonet style as they don't come loose.
|
|||
Materials |
|||
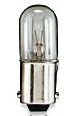
Purchased items4 bayonet style lamp sockets with solder tabs. For example at Radio Shack Catalog #: 272-355 4 6V low current (150 mA) bayonet miniature lamp (plus 2 spares) #1847 bulb For example at Radio Shack Catalog # 272-1115
8 alligator clips. For example at Radio Shack Catalog #270-378 4 D cell batteries approx 16 #8 or #10 1/4" or 3/8" sheet metal screws and washers. Creatively found items
Tools
Labels as pdf and freehand source. This can also be use to draw schematics on. Once you have all the materials construction time is about 2 hours.
|
|||
Building it |
|||
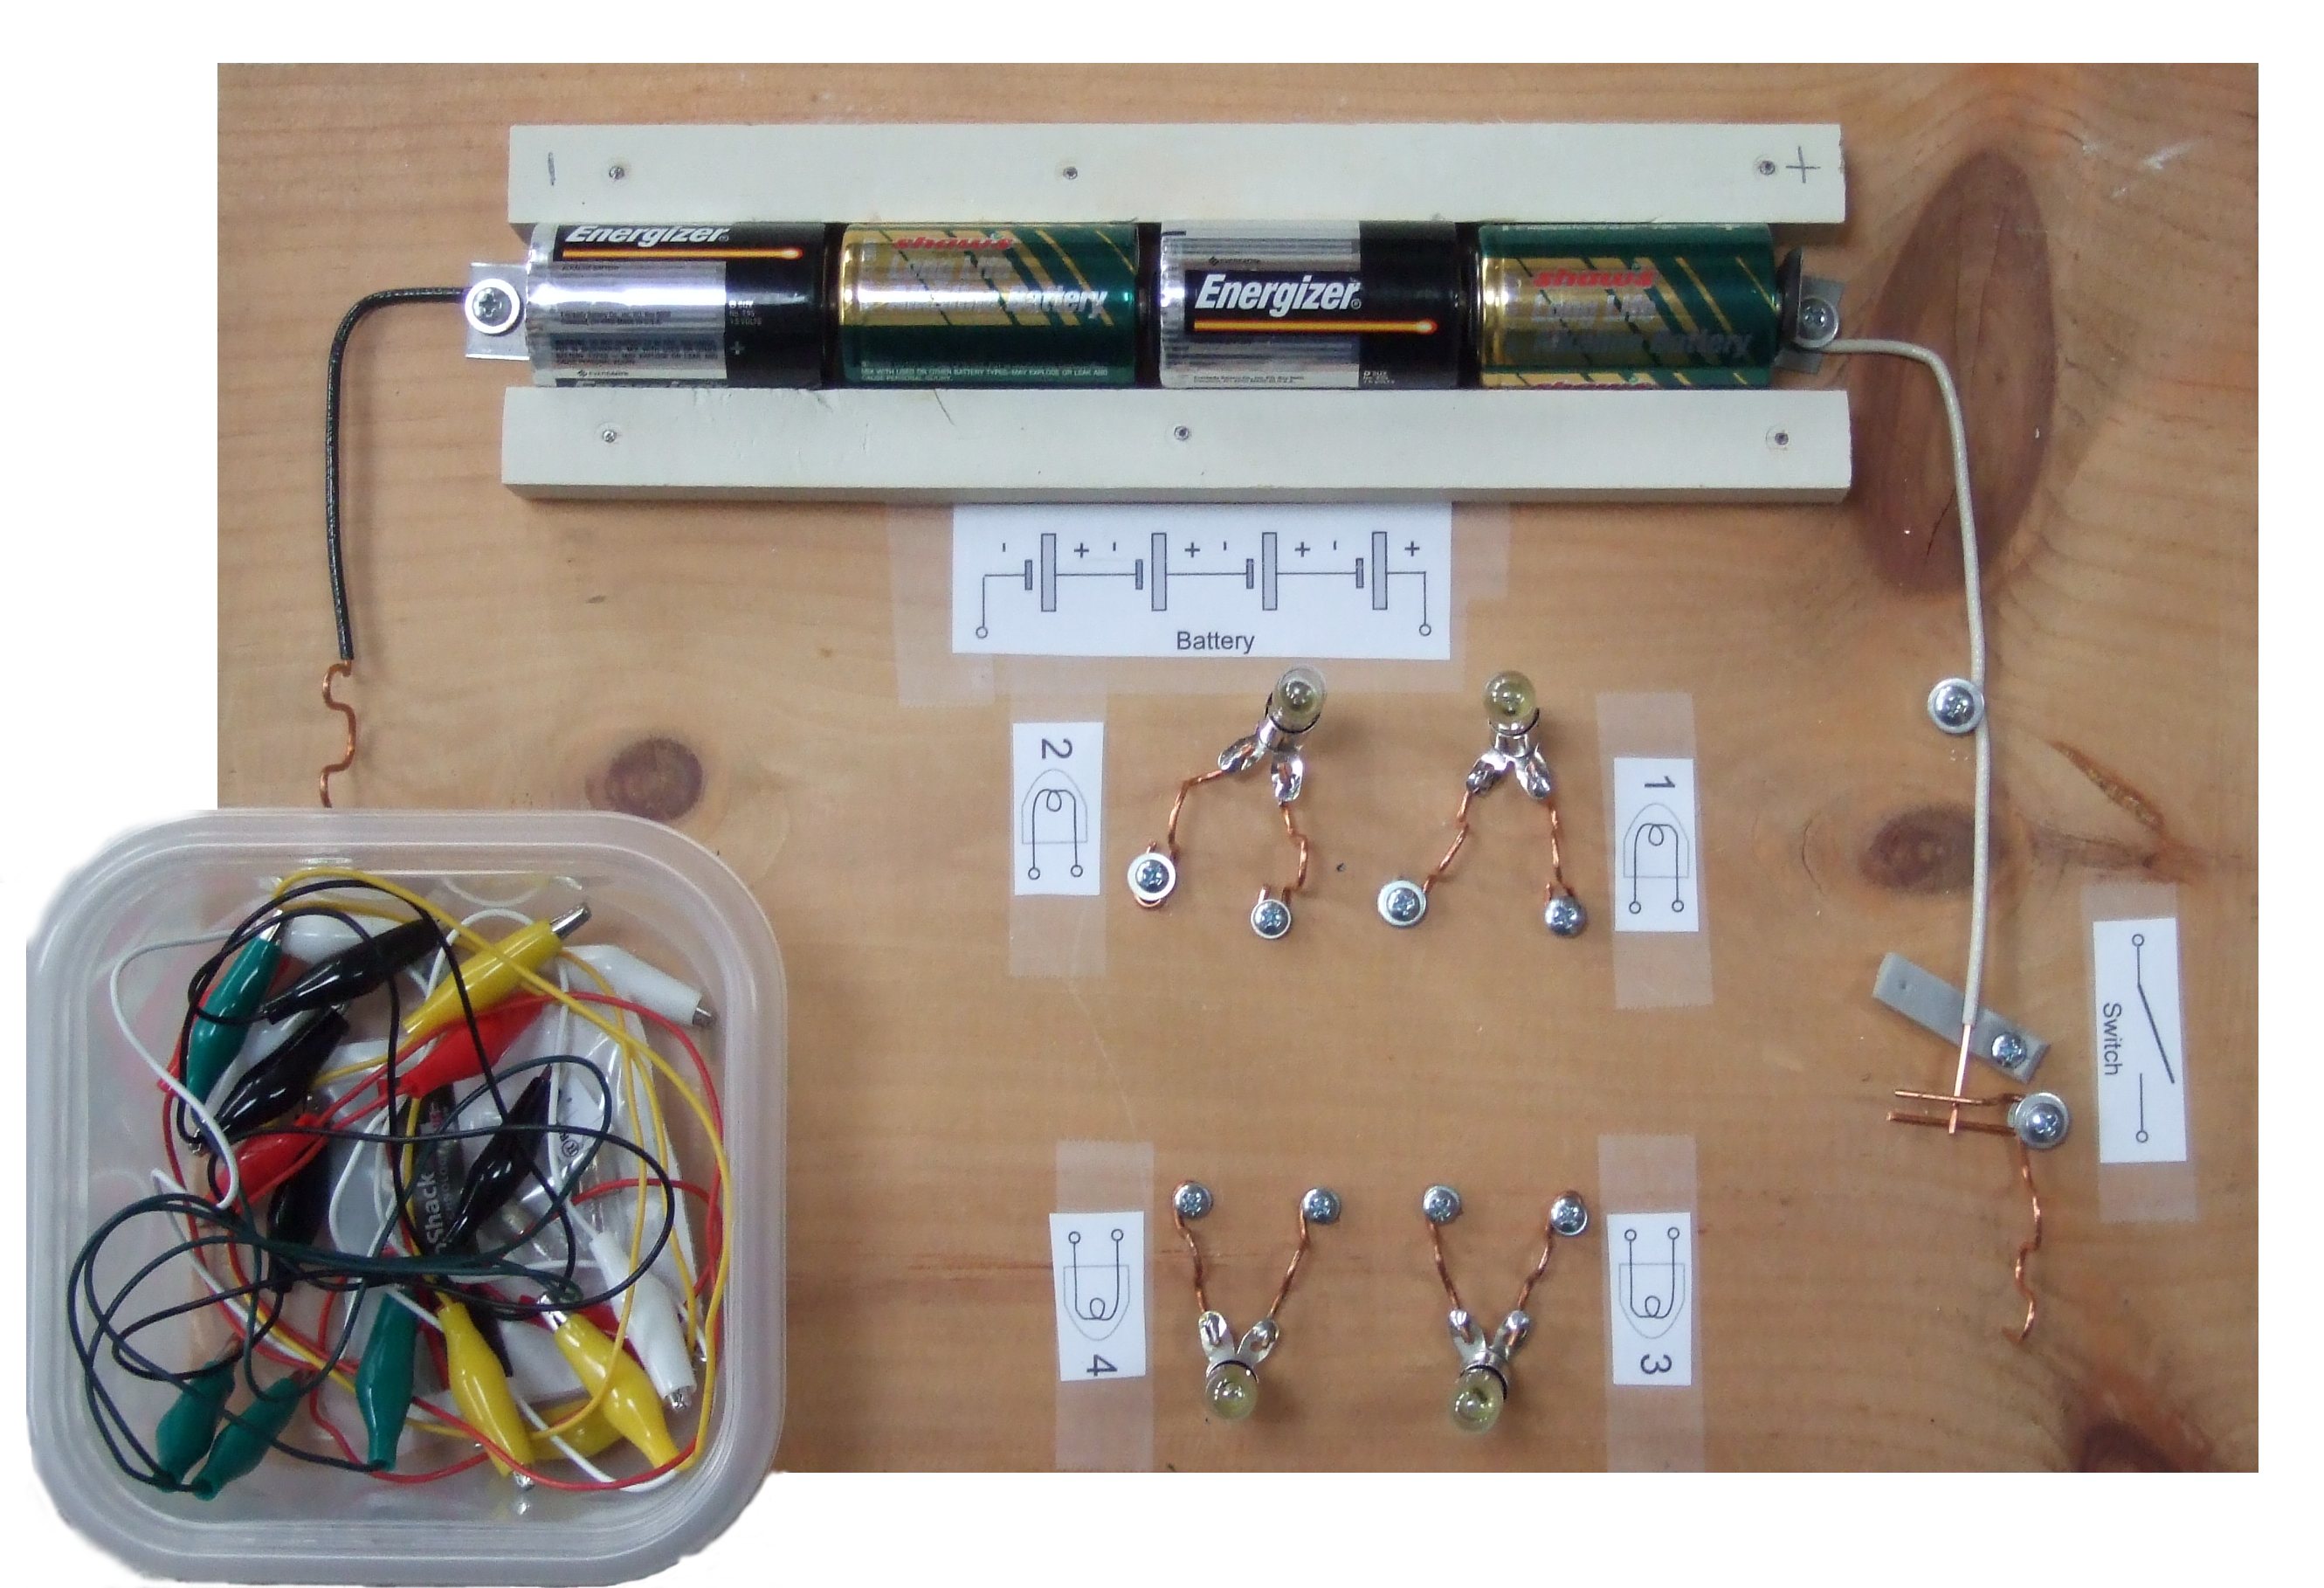
See the detailed photo for an overall picture. Click on the pictures below for a larger view. Nail one strip of wood on the outside edge of the board. Place the 4 batteries down in a row and place the second strip to hold the batteries in place. Take the scrap metal and make 4 "L" shaped pieces (file off any sharp edges), with a hole for a screw (see photo). Place one at the end, and 3 others as shown. This allows 2, 3, or 4 batteries to be used. You may need to add a little bend or bump so that the brackets make good contact with the battery The brackets at the ends have wires attached, as shown here.
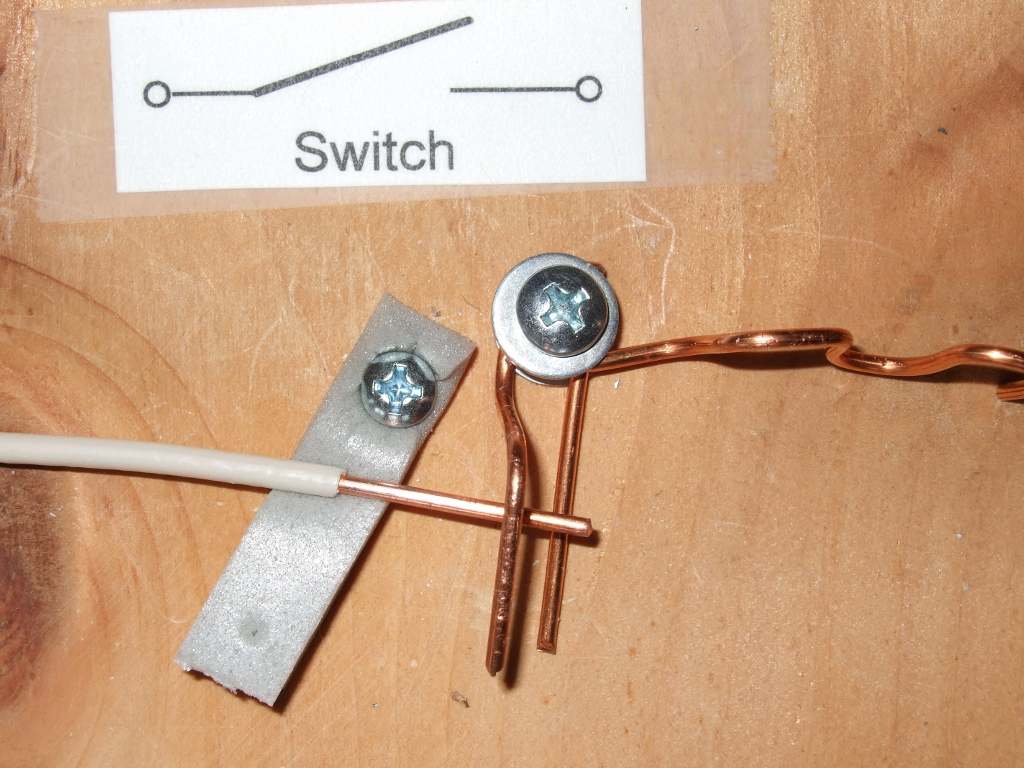
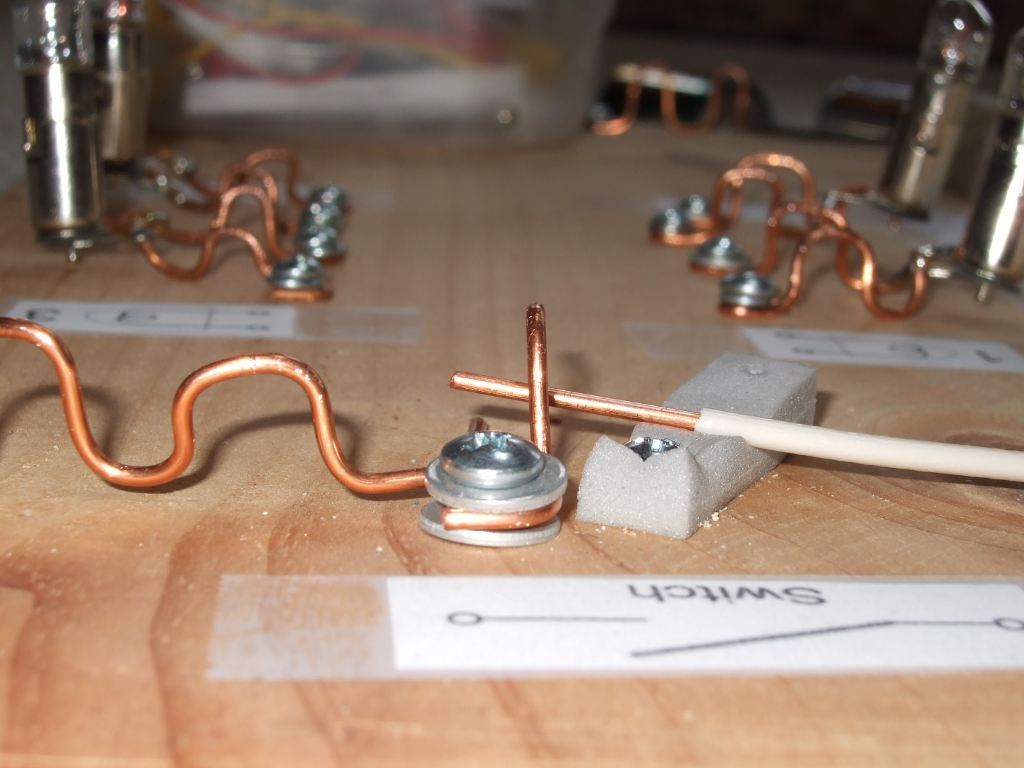
Use a washer below the screw head to make tightening the screw down without pulling the wire easier. The switch is made by striping about 1" of wire and placing a small piece of foam under it as shown in the picture. The other contact is made by bending a small piece of copper wire in a shape like this:
The upper arm allows the other piece of wire to be swung around and rested on it so as to not have to push the switch all of the time. A second piece of wire with a double U shape is added (for the alligator clips to clip to) and then both are screwed down.
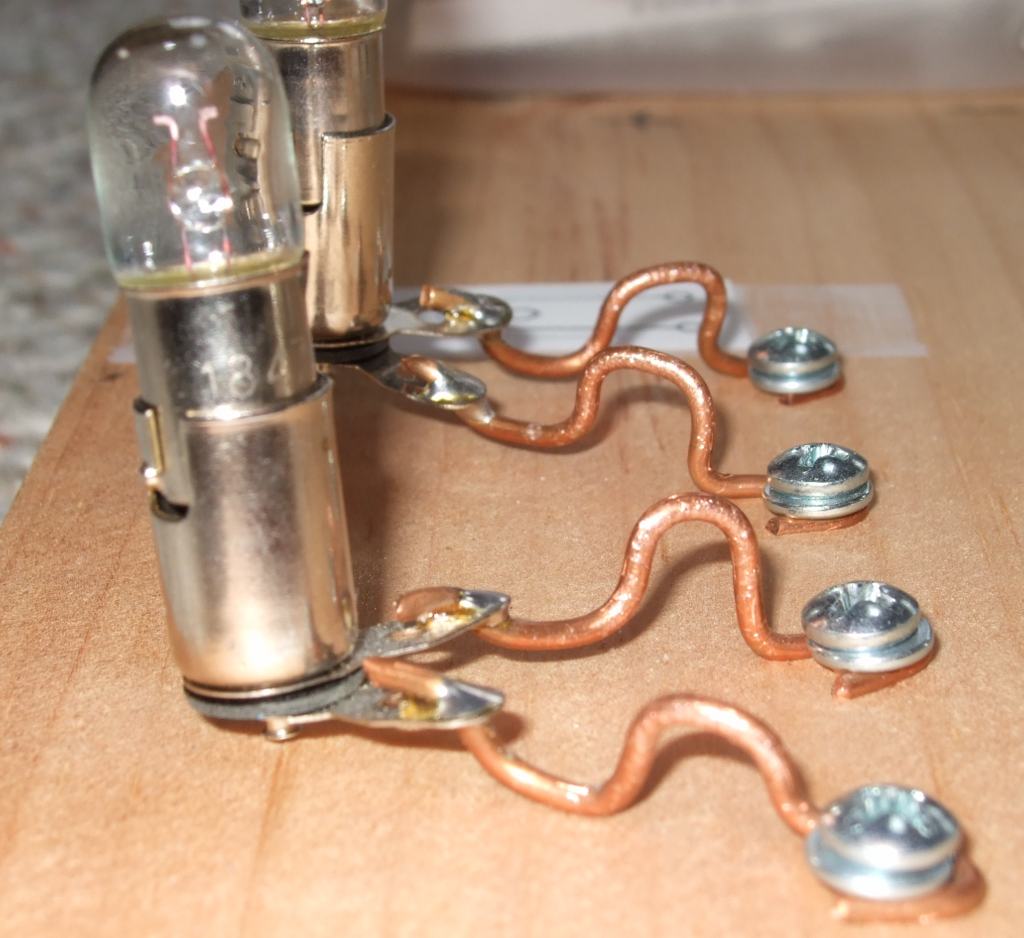
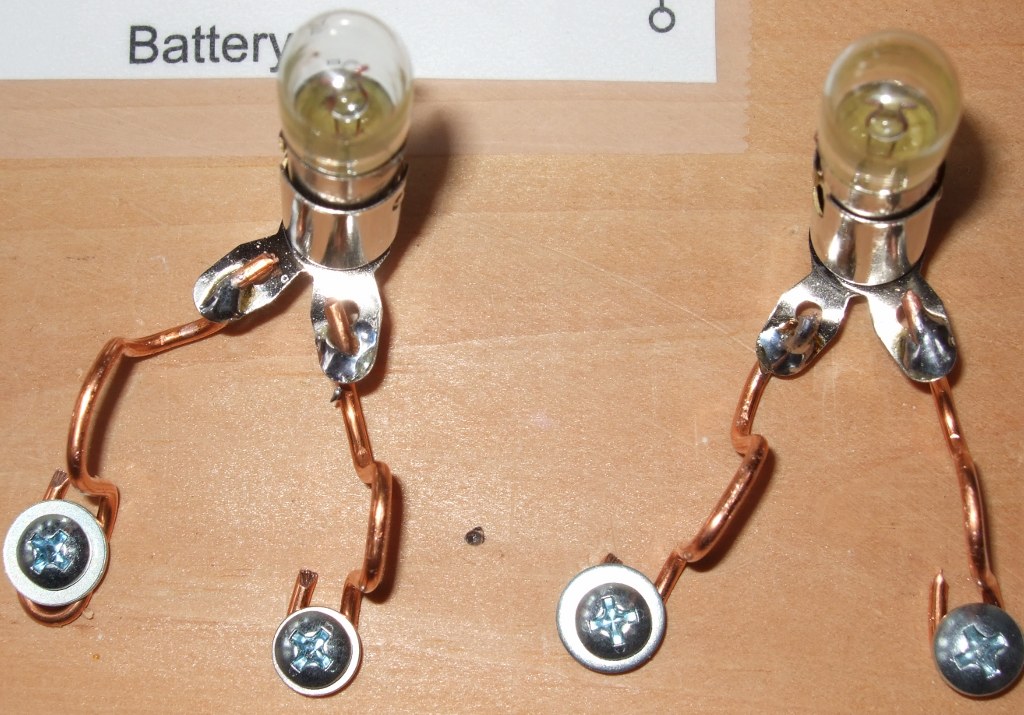
Next prepare 4 lamp sockets, as shown in this photo. Cut eight lengths of bare wire, about 2" long. Bend it in to a serpentine shape as shown in the photo, and solder the end to the base of the lamp socket. Repeat for the other wires. Bend a hook in to the end of each wire and spread them apart as shown in the pictures. Attach to the board with screws and washers. Attach a small plastic container to the board with two screws. With it attached to the board it won't get lost. Print out the symbols and cut them from the paper. Attach to the board with clear tape. Install the batteries and you are done. Note: if storing the board for a long period of time the batteries should be removed.
|
|||
|